Korean fried chicken refers to a variety of fried chicken dishes created in South Korea, including the basic huraideu-chicken and spicy yangnyeom chicken. This fried chicken usually has a thin, crackly & crispy crust. It’s typically made with young, small birds. For this recipe, we’ll be using whole wings.
This recipe is based on a dish found on the Serious Eats website.
Ingredients for Korean Fried Chicken
- 2 teaspoons kosher salt
- 3/4 cups corn starch
- 1 teaspoon baking powder
- 2 pounds chicken wings (about 12 whole wings)
- 2 quarts soybean oil
- 1/2 cup all-purpose flour
- 1/2 cup cold water
- 1/2 cup vodka
- 1 recipe of spicy chili sauce
- Toasted sesame seeds – to garnish
- Thinly sliced green onion – to garnish
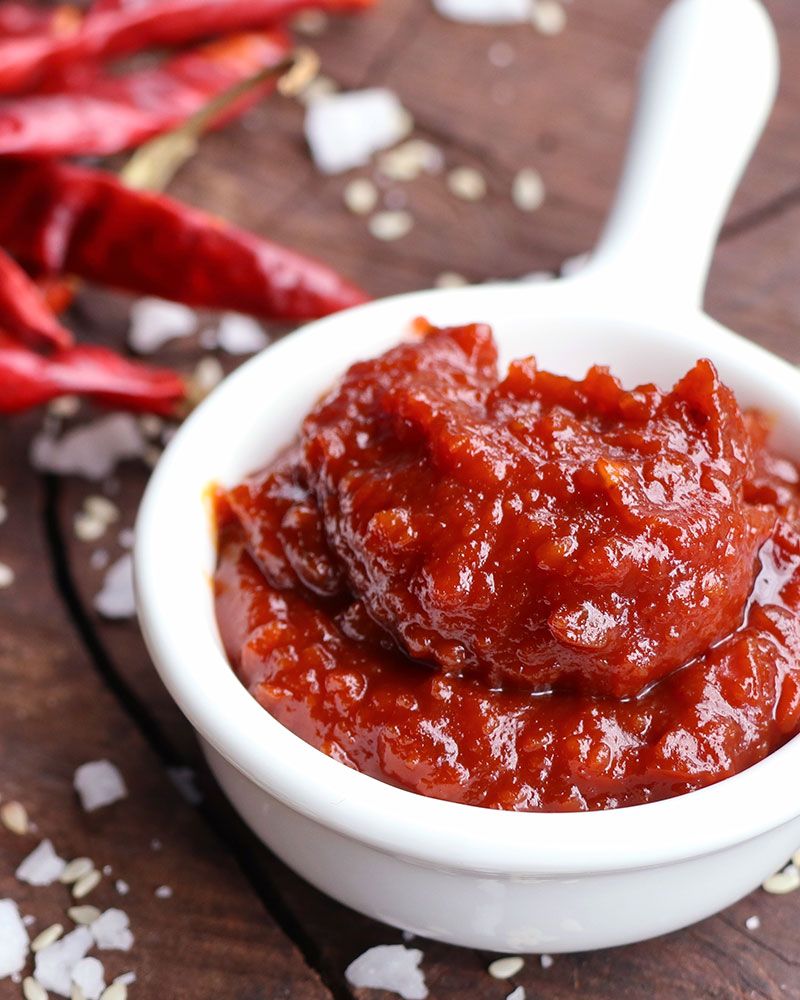
Spicy Chili Sauce
Makes about one quart.
- 1 cup Gochujang (Korean chili paste)
- ½ cup soy sauce
- ¼ cup rice wine vinegar
- ¾ cup brown sugar
- 12 cloves of garlic
- 1 Tablespoon + 1 teaspoon freshly grated ginger
- ¼ cup sesame oil
Add all ingredients to a blender and blend until smooth.
Procedure for Korean Fried Chicken
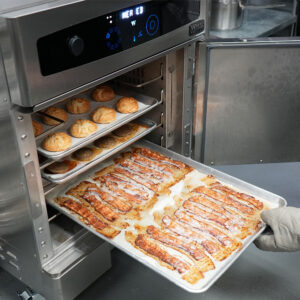
This recipe involves three basic stages. First, preheat the fryer to 350°F. We used soybean oil, though peanut oil is also an excellent choice.
One
- Combine 2 teaspoons kosher salt, 1/4 cup cornstarch, and 1/2 teaspoon baking powder in a large bowl and whisk until homogenous.
- Add chicken wings and toss until every surface is coated.
- Transfer wings to a wire rack set in a rimmed baking sheet, shaking vigorously as you go to get rid of excess coating.
- Transfer to refrigerator and let rest, uncovered, for at least 30 minutes. It can rest there up to overnight.
Two
- Combine the remaining 1/2 cup cornstarch, 1/2 teaspoon baking powder, flour, and 2 teaspoons kosher salt in a large bowl and whisk until homogenous.
- Add water and vodka and whisk until a smooth batter is formed, adding up to 2 tablespoons additional water if the batter is too thick. It should have the consistency of thin paint and fall off the whisk in thin ribbons that instantly disappear as they hit the surface of the batter in the bowl.
Three
- Add half of the wings to the batter. Working one at a time, lift one wing and allow excess batter to drip off, using your finger to get rid of any large pockets or slicks of batter. Carefully lower the wing into the hot oil.
- Repeat with the remaining wings in the first batch. Fry, using a metal spider or slotted spatula to rotate and agitate wings as they cook until evenly golden brown and crisp all over, about 8-9 minutes.
- Transfer to a paper towel-lined plate. Keep warm while you fry the remaining wings.
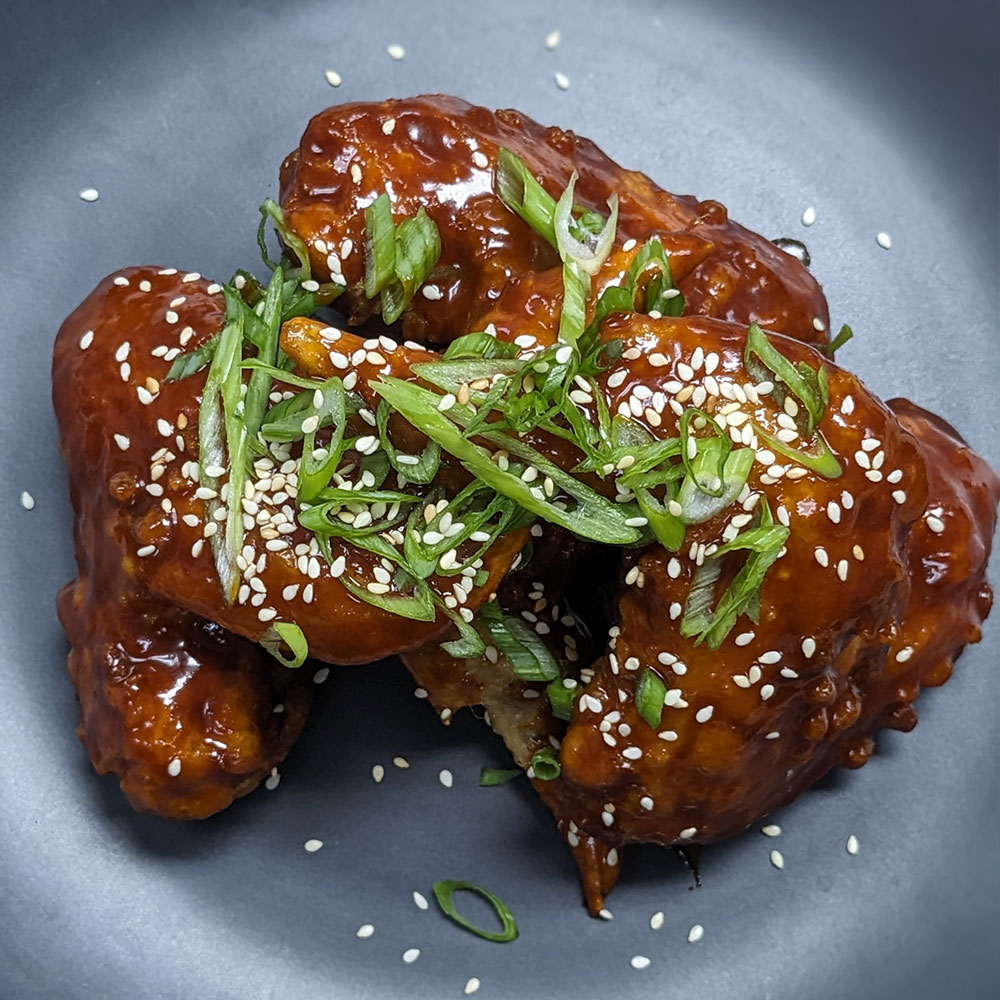
Time to Serve
Transfer wings to a bowl and add spicy chili sauce (or you could enjoy the batter-fried chicken with your choice of sauce on the side)! Toss to coat wing entirely. Place sauced wings onto a serving plate garnish with toasted sesame seeds and thinly sliced green onion.
Holy Moly! – The spicy chili sauce is a flavor bomb in the mouth and nose! The crispy batter and moist chicken make this recipe one that we will be obsessing about for the next foreseeable future! There are so many online cooking tools, recipe databases, blogs, etc… but Serious Eats is a great online resource for “tried and true” recipes. It’s a go-to for us.
Back to this recipe – one thing you should notice is the use of vodka in the batter. Why? The thought process is to inhibit gluten formation from wheat flour. If you’ve worked with flour-based batters at all then you know the consistency of the flour + water mixture changes over time. Starch molecules take time to absorb water, swell, and become tacky. The batter may be thin when you first make it but over time the consistency changes and thickens because of gluten formation. Ethyl alcohol (vodka) in this recipe does not hydrate the way water does. It inhibits the formation of gluten strands. Therefore, the thin batter you create will remain the same consistency over time. This is key to the crispiness of the end product.
Try it and you’ll see for yourself!