Essential Commercial Kitchen Equipment Needed for Chicken Recipes

chicken recipes

Chicken is a ubiquitous protein. The average American consumes over 100 pounds annually. In an increasingly health-conscious world, chicken is considered healthier than most red meat. If you’re a foodservice operator (or planning to be), you should consider expanding chicken options on your menu. Chicken is nutrient-dense, relatively inexpensive (at the moment), and can be prepared in many ways.

The equipment you’ll need to prepare the chicken depends on what kind of chicken you plan to serve. Operators should consider three categories of equipment when expanding their chicken offerings: fryers, ovens, and holding cabinets.

Fryers

When we think chicken, most of us probably think first of fried chicken. It’s a large share of the fast food market. In an industry survey, eight of the top 50 restaurants in the United States are fried chicken concepts.

If you anticipate offering fried chicken, you’ll obviously need a fryer. Pressure fryers are a great option. There are multiple advantages to using pressure fryers. They cook faster and more consistently than open fryers. Cooking oil lasts much longer. And customers often prefer the taste and texture of chicken prepared in a pressure fryer, according to some fast food operators.

chicken recipes

 Pressure frying is ideal for breaded bone-in chicken, wings, filets, or tenders with traditional breading. Winston’s Collectramatic® pressure fryers check off all the boxes. They are highly efficient, available in 4-head and 6-head capacities, and have minimal moving parts. They are true workhorses with decades-long lifespans.

Any Winston pressure fryer can also be used as an open fryer by simply removing the lid. An open fryer may be your best option if you primarily serve more delicate or super crispy foods, such as fish, seafood, double-breaded chicken, fries, onion rings, etc. Your specific menu will determine the best choice. Of course, the Winston team will be happy to advise you on your decision.

Commercial fryers are available with either gas or electric power. Your local energy infrastructure will determine which is a better option for you. However, Winston’s Collectramatic Fryer line is only available as electric.

Whatever type of fryer you choose, you’ll need to filter your cooking oil periodically. Some fryers have the filter integrated into the fryer itself. Winston offers a stand-alone shortening filter. The advantage of this is that a single filter can be used to service multiple fryers. The Winston filter is easy to move and has a low profile to make it easy to store out of the way when not in use.

Cook and Hold Ovens

Of course, fried chicken isn’t the only chicken consumers crave. Chicken lends itself to various preparation methods, such as sous vide, roasted, poached, baked, grilled, and more. It can be the main entrée or the base of a delicious stock – the possibilities are almost endless. Fortunately, so are the applications you can accomplish in a CVap oven!

CVap ovens use controlled vapor heat and dry air heat to create the ideal cooking environment for almost any type of food. CVap can replace most of the cooking equipment in your operation. Importantly, CVap ovens allow you to scale up your production. Capacities of up to 14 shelves allow for high production in a small footprint. Imagine trying to match that production scale with immersion circulators, woks, or kettles.

CVap@ Cooking and Holding Processes

Do you serve barbecue? You can add the Winston Smoker Box accessory to your CVap oven to convert it into a traditional smoker. Bear in mind that once you add a smoker to a CVap oven it will no longer be a ventless oven and will either need to be under a hood or rolled to a safe outdoor spot. 

Staging chicken is another great application in CVap.  Simply put, staging is cooking food to a temperature just below the serving temperature and holding it there. When an order comes in, the food can be pulled from the oven, finished on a grill or skillet, and served to the customer in a fraction of the time it would take to cook from raw. This is an effective process no matter what your center plate protein is, but it’s particularly powerful in a chicken program.

Winston Smoker Box
Holding in CVap

CVap technology was initially developed for holding cabinets. Of course, the technology has evolved as an incredibly precise cooking technology. Hot holding continues to be a critical process in most kitchens.

CVap ovens can do double duty as holding cabinets. This prevents food from overcooking and frees staff from constantly monitoring the oven. It also makes it possible to cook overnight, removing the need for staff altogether. Holding serves a double function. It maintains product quality over time, improving service and reducing waste. It also improves efficiency by keeping the high-quality product at hand and accessible.

CVap Holding Cabinets offer the same incredible precision as CVap ovens. CVap cabinets are also a perfect partner for fryers. For example, fried chicken can be held in the cabinets for extended periods, making it possible to build up inventory for rush periods. CVap cabinets offer a superior hold by keeping chicken crisp without making it soggy or drying out, especially when compared to chicken in lower-tech holding appliances, such as heat lamps or dry, hot boxes.

Holding isn’t limited to fried chicken. CVap cabinets are also great for holding more succulent dishes. They can simultaneously hold sides, such as mashed potatoes or mac & cheese, with the same precise hot hold.

chicken recipes
Poultry in a Post-Pandemic World

According to poultry industry reports, consumers have fundamentally changed their habits, compared to the pre-COVID-19 world. Consumers are spending more now, to regain opportunities they missed during the pandemic. Experts recommend that chicken brands should position themselves as a splurge, rather than highlight chicken as the value protein, to attract these consumers.

The report went on to say that brand loyalty took a hit during the pandemic. This may provide an opportunity for other chicken concepts to charm customers away from the more established operations. Perhaps there’s never been a better time to expand your chicken offerings. Contact us to discuss how Winston can help your operation take advantage of the changes in chicken.

Barbecue in a CVap® Oven – Smoking & Holding

barbecue platter

CVap® ovens are well-known for their versatility and precision. These qualities make them particularly well-suited for barbecue operations. Barbecue is the realm of low and slow cooking. And nothing does low and slow better than CVap.

We wanted to test the most popular proteins for most BBQ joints, pork ribs, beef brisket, and chicken. First, we needed the perfect rub.

The Seasoning Blend

Prepare the seasoning blend and set it aside.

The Proteins

  • Pork Back Ribs – 3 to 4 Lbs.
  • Whole Chickens – 3 Lbs.
  • Whole Brisket – 17 Lbs.

The Barbecue Process

Pork Back Ribs – RTV5-14UV with the Winston Smoker Box

Cook Time approximately 5 hours
Cook Vapor 190°F / Air 220°F

Hold Infinite
Hold Vapor 135°F / Air 145°F

Holding ribs for an extended time in CVap ovens is beneficial to food quality. The long, slow heat dissolves the connective tissue within the meat. For pull-off-the-bone tenderness, we recommend a five-hour hold. To get fall-off-the-bone tender, extend the hold to six hours.

barbecue

It’s important to remember that the cooking time depends on the size of the product and the orientation of the product in the pan. Here are a few helpful tips:

  • Get similar-sized ribs for a similar time cook. We used 2.75-3.25 Lbs.
  • If you get larger or smaller ribs, just adjust the time accordingly:
    • Increase time for larger ribs; >3.5 Lbs. +.
    • Decrease time for smaller ribs; <2.5 Lbs.
  • Increase time if preparing more than 5-6 ribs
    • Increasing the thermal load increases the time it takes to reach the desired temperature and texture.
  • If you shingle the ribs to get more per shelf, you’ll need to increase the cooking time.
  1. Remove back ribs from packaging.

  2. Score backside (bone side) with a paring knife.

  3. Liberally season both sides of each rib. Allow the seasoned ribs to rest for 10 to 15 minutes.

  4. Place ribs onto a rack in the preheated oven. Keep placement in a single layer, bone-side down.

**Chef’s Tips – We recommend placing a foil-lined sheet pan on the bottom shelf, just above the smoker. This will catch the product’s drippings and make cleanup easier.

Engaging Barbecue with the Winston Smoker Box

  1. Plug the timer into the wall and ensure the smoker box is connected to the timer. We like to use mixed wood pellets as the smoke medium. However, sawdust or smaller chips (no bigger than a fingernail) can be used.

  2. Adjust the timer to start the heating element, and add your smoke medium onto the heating element inside the smoker box.

  3. Place the smoker box on a sheet pan inside the oven on a bottom rack, just above the evaporator. The box takes about 15-20 minutes to preheat and start smoldering. We smoked the ribs for about 3-4 hours.

  4. Press ENTER once the product is placed inside, and the smoker is filled and in place.

Whole Brisket – RTV5-14UV with the Winston Smoker Kit

Cook Time – 9 Hours
Cook Vapor – 190°F / Air – 220°F

Hold – Infinite
Hold Vapor – 135°F / Air – 145°F

  1. Use the same barbecue seasoning blend as the pork ribs.
  2. Trim the brisket’s top and side fat, and between the point and flat.
  3. Season liberally on all sides, and in between the two muscles.
  4. Place brisket onto a rack in the preheated oven.
  5. Engage the Winston Smoker Box. We used mixed wood pellets for about 6 hours.
barbecue

Whole Chicken – RTV5-14UV with the Winston Smoker Box

Cook Time – 3 Hours
Cook Vapor – 170°F / Air – 300°F

Use the same seasoning blend as the pork rib and brisket…yes, it’s that universal AND that good!

  1. Pat the chicken dry and season liberally on all sides, under the wings, legs, and inside the cavity.
  2. Place chickens on a rack in the preheated oven.
    Be careful not to crowd.
  3. Engage the Winston Smoker Box. We used mixed wood pellets for about two hours. Check internal temperature. As with any poultry, it’s important to cook to at least 165°F.

Chicken Stock – CVap Style

chicken stock with ladle

Here we are in the long, grey abyss that is winter in the Northern Hemisphere. When it’s frigid outside, it’s natural for us to crave comfort food. And what’s more comfortable than soup? The foundation of any great soup is stock. Accordingly, we set out to cook up some wonderful chicken stock in a CVap® oven. Of course, since it could be done overnight, it was a no muss, no fuss, no sweat process.

Most importantly, this recipe will produce quarts and quarts of stock!

The Settings

CVap Cook and Hold or Retherm Oven

  • Cook Time – 8 Hours
  • Vapor (Cook) – 180°F
  • Air (Cook) – 210°F
  • Hold Infinite
  • Vapor (Hold) – 135°F
  • Air (Hold) – 136°F

Ingredients

  • 50lb – Chicken Leg Quarters
  • Mirepoix – onions, celery, & carrots
  • Cold Water
chopping veggies for chicken stock
mo mirepoix for stock
mirepoix for stock
pans of veggies for chicken stock

The Chicken Stock – The Process

  1. Preheat the oven to the program above.
  2. Evenly distribute ingredients through three 6” full hotel pans (or any kind of deep pan or assortment of pans that will fit into the oven).
  3. Once everything is situated, hit the ENTER button to start the program.
  4. Go home!
  5. Come back the next morning to a beautifully simmered and clear chicken stock.
  6. Carefully remove pans from the ovens. Using tongs, remove chicken from the stock liquid. This chicken can be shredded for soup, or frozen for future use.
  7. Strain the stock through cheesecloth, to remove larger pieces of chicken, bone, and vegetable.

To be sure, the resulting  stock is outstanding. It’s nearly clear, savory, and perfect for soups. Of course, go ahead and freeze any chicken stock that you don’t use right away. It will bring you comfort long after the winter snows have melted.

chicken into pot for chicken stock
chicken for chicken stock
cooked chicken for chicken stock
strain chicken stock with cheesecloth
chicken stock cheesecloth
chicken stock

Staged Wings in CVap

staged wings

Staged wings cook perfectly and juicy in less than eight minutes. Chicken wings in CVap® save time and labor, and taste great. Cooked and held in a CVap oven, they can be fried quickly for prompt service.

Subscribe to our YouTube channel for informative CVap videos and more.

Chicken Wings
Blog Chicken Wings
chicken wings staged

Find more staged wings and chicken things!

Get Your Poultry Sales Poppin’ with CVap Wings!

What goes better with summertime gatherings than chicken wings? There are so many ways to flavor and cook this delicious treat. When it comes to frying them, it feels like it takes forever.

Our CVap Cook and Hold Oven is the workhorse in the kitchen, so we decided to put it to use to reduce fry time. READ MORE

Nashville Hot Chicken

Nashville hot chicken’s powerful poultry story originated nearly seven decades ago, at Prince’s Hot Chicken Shack. Apparently Thorton Prince was quite the lady’s man. Tiring of his late night escapades, his gal served him up a Sunday breakfast of fried chicken, generously doused in cayenne pepper and other fiery spices. Her revenge backfired – rather than crying out in pain, he loved it. Consequently the inspiration for Nashville Hot Chicken was born. If you’re interested, read the whole story on Prince’s website. Numerous other restaurants and chains, inspired by Prince’s, have put their own twist on this Nashville classic. READ MORE

Chicken & Waffles – Damn It’s Good

chicken and waffles

On a recent quiet Friday afternoon, we cooked up a favorite dish – Fried Chicken and Waffles. This sweet and savory dish is increasingly popular, but has been around (in some variation) for hundreds of years. The familiar soul food version dates from the Wells Supper Club in Harlem, New York, in 1938. In order to really push this cardiac-busting meal over the top, we added a side of tater tots.

We utilized several pieces of our equipment. Our Collectramatic Fryers are famous for making the world’s best chicken, so that was a no-brainer.

Although our fryers were engineered specifically to cook chicken, you can cook other stuff in them too. In this case, a tasty side of tater tots.

Chicken and Waffles and Tots, Oh My

The Process – Chicken

The fryer was programmed for chicken strips/filets (for full details on those settings, see the guidelines in the Fryer Owner’s Manual, page 20). As the fryer preheated, we prepared the chicken.

Starting with several whole boneless, skinless chicken breasts, we trimmed the fat and cut into ¾” wide strips. The chicken strips marinated for about 30 minutes in smoked pickle juice. It’s a well-known secret that pickle brine is the special je ne sais quoi that gives Chick-Fil-A’s chicken its addictive flavor. We aimed for a similar flavor profile.

trimming the chicken
Brining the chicken

After marinading, the strips were ready for breading. The breading was a blend of seasoned flour, salt, and a little Dan-O’s Original Seasoning. To properly bread, we used a four-pass dredge.

  1. Pickle Juice
  2. Seasoned Flour
  3. Pickle Juice
  4. Seasoned Flour

These were cooked under pressure, in a clamshell basket.

The Process – Tots

Tater tots hit the fryer next. These were cooked open, in a clamshell basket. They cooked in about five minutes at 325°F. The results were perfect.

The tots took a little trial and error. We initially cooked a batch in an open basket. Though the tots came out perfectly cooked, the lack of separation caused them to stick together. The resulting mass was about the size of a human head. This was fine for an informal afternoon cooking session, but wouldn’t have been ideal to serve to customers. 

Unable to resist them, Marketing Manager Ryan consumed roughly half of the tater tot ball. Blessed with the metabolism of a hummingbird, he constantly “tested” the tots to verify that, yes, they still tasted great.

Tots
waffles in CVap

The Process – Waffles

The waffles were of the frozen variety. We went CVap on those, retherming them in an RTV Retherm Oven, then moving them into an HOV Holding Cabinet while we prepped stuff for the fryer.

The frozen waffles were quick and easy to prep. The RTV oven was preheated to 200°F Vapor, 325°F air temp. After a quick seven minutes, they were done. We moved them to the HOV holding cabinet (preheated to 100°F vapor temp, 150°F air temp). They stayed hot and fresh until we were ready to assemble.

The Results

The final assembled dish was simple, easy, and delicious. The chicken strips were placed on the bed of waffles, and dribbled with maple syrup (the real stuff, not that fake high fructose crap). A generous side of tots completed the dish.

We had to taste the results. They were, of course, delicious.

Banh Mi Sliders in CVap

banh mi sliders

Banh Mi Sliders are easy when you stage and hold them in CVap equipment. Staging can increase the speed of service without sacrificing quality! Most are familiar with the popular Vietnamese Banh Mi sandwich. Below is the Winston recipe for this popular sandwich. The popularity of ethnic food is on the rise. We’re seeing more and more examples of these on menus everywhere. The fact that consumers are more open to new flavors and cuisines represents some great opportunities for the restaurant industry.

RECIPE: Banh Mi Sliders

Unlike traditional Banh Mi, we use pork and chicken in our sandwich recipes. Whether you chose to use one or the other or both proteins, you cannot go wrong with this version of a Vietnamese classic.

½ pound ground pork
½ pound ground chicken
¼ cup finely chopped scallions
2 tablespoons finely chopped ginger
1 egg, lightly beaten
2 teaspoons chili sauce
2 teaspoons Worcestershire sauce
1 teaspoon light brown sugar
1 ½ teaspoon kosher salt

First, mix all the ingredients into a large bowl. Second, form the mixture into patties. Finally, refrigerate the patties until you are ready to stage them in CVap.

banh mi sliders

Advance Staging in CVap® Cook and Hold Oven

Banh Mi CVap Process

Preset a Cook and Hold unit to 165°F vapor/166°F air FOR 60 MINUTES and allow approximately 30 minutes to preheat.

  1. Remove patties from refrigerator, place in oven, and process for one hour and 35 minutes to reach a minimum temperature of 165°F.
  2. Patties can now be held and grilled or pan-seared for about one minute and 30 seconds and then served on French rolls with slaw (suggestion follows) or kimchi, or the patties can be quick-chilled and completed to order from a refrigerated state.

Either way, you choose to finish the patties, you have effectively eliminated over-cooking, and you are guaranteed a juicy, delicious Asian favorite in record time. Think of the possibilities for food truck production!

Slaw: we typically top our cooked Banh Mi sliders with a vibrant, crunchy combination of carrots, onions, cabbage, Sriracha, vinegar, and fresh cilantro.

Bringing the Heat with Nashville Hot Chicken

Nashville hot chicken

Winter may be waning, but the popularity of Nashville Hot Chicken sure isn’t. We decided to try our hand at preparing a big batch. It was as good (and hot!) as promised.

Nashville Hot Chicken’s History

Nashville Hot Chicken’s powerful poultry story originated nearly seven decades ago, at Prince’s Hot Chicken Shack. Apparently Thorton Prince was quite the lady’s man. Tiring of his late night escapades, his gal served him up a Sunday breakfast of fried chicken, generously doused in cayenne pepper and other fiery spices. Her revenge backfired – rather than crying out in pain, he loved it. Consequently the inspiration for Nashville Hot Chicken was born. If you’re interested, read the whole story on Prince’s website. Numerous other restaurants and chains, inspired by Prince’s, have put their own twist on this Nashville classic.

The Process

We brined the chicken in the fridge overnight using a simple 6% brine. Learn everything you need to know about brining on our friends’ site Genuine Ideas (browse under their food header).

We lightly dusted the chicken with seasoned flour. After that we dipped it in a simple blend of eggs, buttermilk and hot sauce.

Dipping

Subsequently, we tossed lightly again in breading mix, giving us a light double-breaded chicken. Double-breading creates a nice robust crunch once the chicken is fried.

Properly prepped, the chicken was ready for the Collectramatic® Fryer.

breaded hot chicken
nashville hot chicken fresh from the fryer

We fried the chicken for 15 minutes at 325°F. It emerged from the fryer a mouth-watering golden brown. After allowing excess oil to drip away, we painted the spicy special sauce on with a pastry brush.

The hot chicken was as good as we hoped, delivering a delicious heat that delighted our taste buds while making our faces flush and our brows sweat.

This chicken can be held for two hours in a CVap® Holding Cabinet. After frying, place it directly in a CVap set to 135 +50. Apply the sauce just before serving.

Here’s a pared-down version of the recipe (in case you’re not feeding an army).

Nashville Hot Chicken Recipe

  • 2 – 3 1/2-4-pound chickens, each cut into ten pieces (breasts halved)
  • 1 gallon of 6% brine
  • 4 large eggs
  • 2 cups buttermilk or whole milk
  • 2 tablespoons vinegar-based hot sauce (such as Tabasco or Texas Pete)
  • 4 cups all-purpose flour seasoned with salt, pepper and paprika. (You may use your own special flour mix if you’d like).
  • Vegetable oil (for frying; about 10 cups) (unless, of course, you have a Collectramatic fryer handy).
  • 6 tablespoons cayenne pepper
  • 2 tablespoons dark brown sugar
  • 1 teaspoon chili powder
  • 1 teaspoon garlic powder
  • 1 teaspoon paprika
Chicken Done Cut

The Process

  1. Whisk eggs, buttermilk, and hot sauce in a large bowl. Subsequently, whisk flour and remaining four teaspoons salt in another large bowl.
  2. If you’re not using a Collectramatic fryer, fit a Dutch oven with frying thermometer. After that pour in oil to about two inches depth. Heat over medium-high heat until thermometer registers 325°F.
  3. Pat chicken dry. Working with one piece at a time, dredge in flour mixture, shaking off excess, and then dip in buttermilk mixture, letting excess drip back into bowl.
  4. Subsequently dredge again in flour mixture and place on a baking sheet.
  5. Working in four batches and returning oil to 325°F between batches, fry chicken, turning once after 15 minutes until skin is deep golden brown and crisp. Check with an instant-read thermometer inserted into thigh pieces to verify that the inner temp registers at least 185°F (165°F for white meat). This usually takes ten more minutes after the turn, for a total cook time of 25 minutes.
  6. Transfer to a clean wire rack set inside a baking sheet.
  7. After that, remove oil from heat and let it cool slightly.
  8. Whisk cayenne, brown sugar, chili powder, garlic powder, and paprika in a medium bowl.
  9. Carefully whisk in 1 cup hot frying oil or melted lard.
  10. Just before serving, brush fried chicken with spicy oil. Serve with bread and pickles.

Enjoy!

Delicious South American Fried Chicken

chicken setpoints

A famous South American fried chicken chain wanted to take a closer look at our Collectramatic® Pressure Fryers. The owner had heard about Collectramatic but had never tested one. His purchasing manager pointed out our price compared to their current brand.

Our goal was to match their current process and texture and to reduce their maintenance costs. Their current fryer cost them a lot of time and money on maintenance.

Maintenance was a simple answer. However, the Collectramatic had more to offer against their current fryer:

  • Only has a few moving parts that relate to pressure.
  • Gaskets are simple to remove and clean.
  • The fryer pot is round and does not have corners that are hard to clean and prone to cracking.
  • Collectramatic fryers’ heating elements are immersed in the oil, resulting in faster recovery time.
  • Fryers can fryer up to 20 batches of 6 heads of chicken (120 heads) without filtering. On the other hand, their fryer needed filtering after only four to five batches.
settings for south american fried chicken
Chef Barry tests the settings on the Collectramatic

The South American Fried Chicken Test

We cooked a few rounds of South American fried chicken at our “normal” setting. Although the final color matched their website photo, the customer was looking for a much darker chicken.

Clearly, the big question was whether our Collectramatic fryer was capable of matching the South American fried chicken they were looking for? “I had confidence, but they have a unique process that I had not tried before,”, said Chef Barry.

First, the chicken was breaded and then refrigerated for a minimum of one hour before frying. In our test, the breaded chicken was loaded into a  quarter rack basket, then placed in the refrigerator. On the other hand, they customarily breaded the chicken, placed it directly on a sheet pan, and refrigerated it. Later, they would hand drop each piece of chicken into the pressure fryer.

Now the big test! Having never had the opportunity to try their chicken beforehand, we had never tasted their breading or their chicken (secret stuff). We were ready! So Chef Barry set the Collectramatic to their setting of 350°F for 12 minutes and 30 seconds.

Amazing Results!

The breaded chicken was pulled from the refrigerator after one hour. Needless to say, the breading was fully set, as opposed to when you bread and place it directly into the fryer. We loaded the chicken in the fryer and started cooking.

In the meantime we waited patiently as the Collectramatic fryer went to work, uncertain how this breaded, refrigerated chicken would turn out.

After the buzzer sounds we pull the chicken. The chicken appears much darker than we are used to. We look at the customer to gauge his reaction. Nothing.

We then un-racked the chicken and let the customer dive in.

He begins pulling pieces apart, looking very closely at the breading, and studying the interior like a true fried chicken professional. Taking a knife, he cuts through the bone to examine the marrow. He grabs a thigh and takes a huge bite. Wait for it… “Perfect, now that’s what I’m talking about!”

We were still a bit skeptical about the dark color until we grabbed our first piece and took a bite. The exterior was dark, firm, crunchy with that old-school black iron skillet fried chicken look. It did not have a burned or overcooked taste. The interior was very juicy and very tender. It was absolutely amazing!

It is clear why this South American fried chicken chain has such a huge following.

So, the next time you are making fried chicken in our Collectramatic fryer, give this breading option a try. You will not be disappointed!

south american fried chicken
Single Chicken

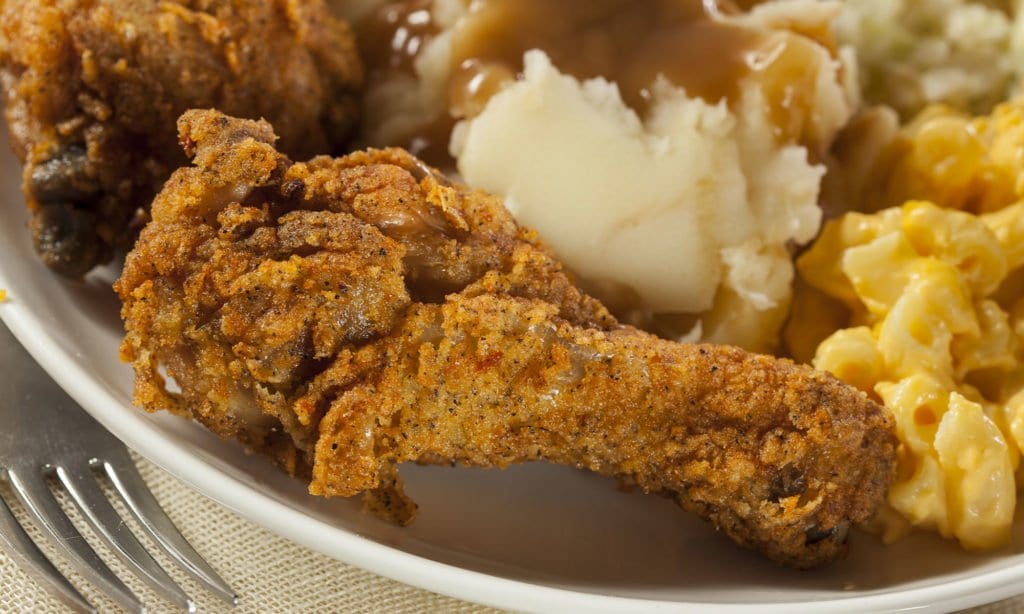
Winston Collectramatic Pressure Fryer: Benefits for Fried Chicken
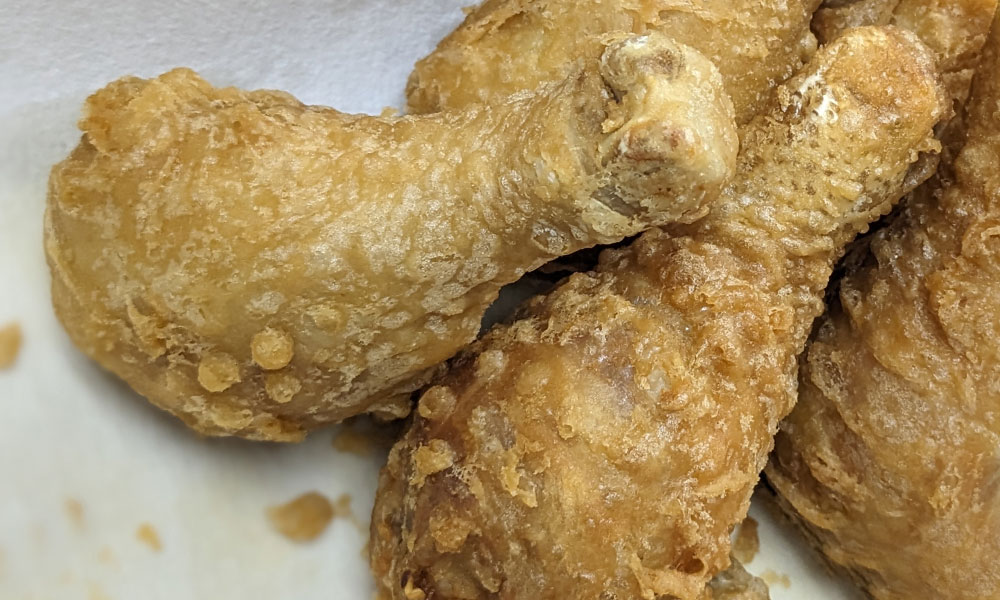
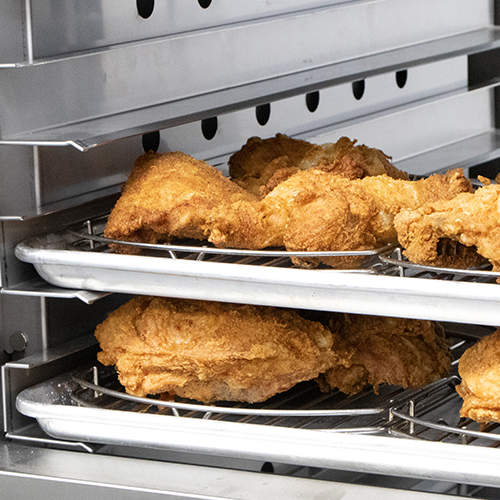
Fried chicken

Poultry Trivia:

  • More than half of all chicken entrees ordered in restaurants are for fried chicken.
  • In 2020, 95% of commercial restaurants had fried chicken on their menu.
  • The average American eats over 80 pounds of chicken each year.
  • According to the National Chicken Council, more than 1.4 billion wing portions were consumed on Super Bowl Weekend in 2020 (more than 100 million pounds).

What menu item is going to keep customers coming back for more? To-go orders? Catering offerings? What is going to set your operation apart from your competition? Fried chicken! It’s the ultimate comfort food; perfect for challenging times.

Let’s look at the features and benefits of our Collectramatic® Pressure Fryers. Available in 4-head (32 pieces per drop) and 6-head (48 pieces per drop) configurations.

Fried chicken

Benefits of Pressure Frying:

  • Quicker cook times
  • Juicier product
  • Tenderization
  • Texture control
  • Healthier product

Benefits of a Winston Collectramatic Pressure Fryer:

  • Microprocessor controller
  • Reliability – Very few moving mechanical parts to wear out or break.
  • Round pot – For strength with a single weld, sediment cannot build up in the corners and continue to cook/burn the oil.
  • Footprint – It’s all in the numbers. With a LP56 fryer 6-head, you can fry approximately 192 pieces per hour and 1,200 pieces before you need to filter the shortening. Our collector, the largest in the industry, catches all the sediment from the cooking vat, so it does not continue to cook.

At a recent training, with an install of three LP56 Collectramatic fryers, the customer was able to pressure fry 576 pieces per hour and 3,600 pieces before they needed to filter the shortening.

To really boost your program, partner your fryer with a Winston Shortening Filter and a CVap® Holding Cabinet or two, and now you have a fried chicken program sure to bring the hungry crowds through the door!

who doesn't love drumstics?
quarter rack basket to maximize production
wing it!