No, That's Not an Oxymoron
If you’re familiar with CVap®, you probably think of it as a “wet” cooking device. After all, the power behind it is derived from heated water vapor. However, it’s also great for dry processes, like dehydrating. Typically, even without water, CVap ovens hold temperatures steady.
Dehydrating calls for relatively low temperatures. After all, the goal isn’t to cook the food. It is to remove water from the food. Our CVap ovens are able to maintain the low 120°Fs temperature range for the extended time necessary to complete the dehydration process.
We tested a variety of fruits and veggies and experimented with meringue as well.
Fruits & Vegetables
Ingredients
We wanted to test our CVap ovens by dehydrating a range of foods, including:
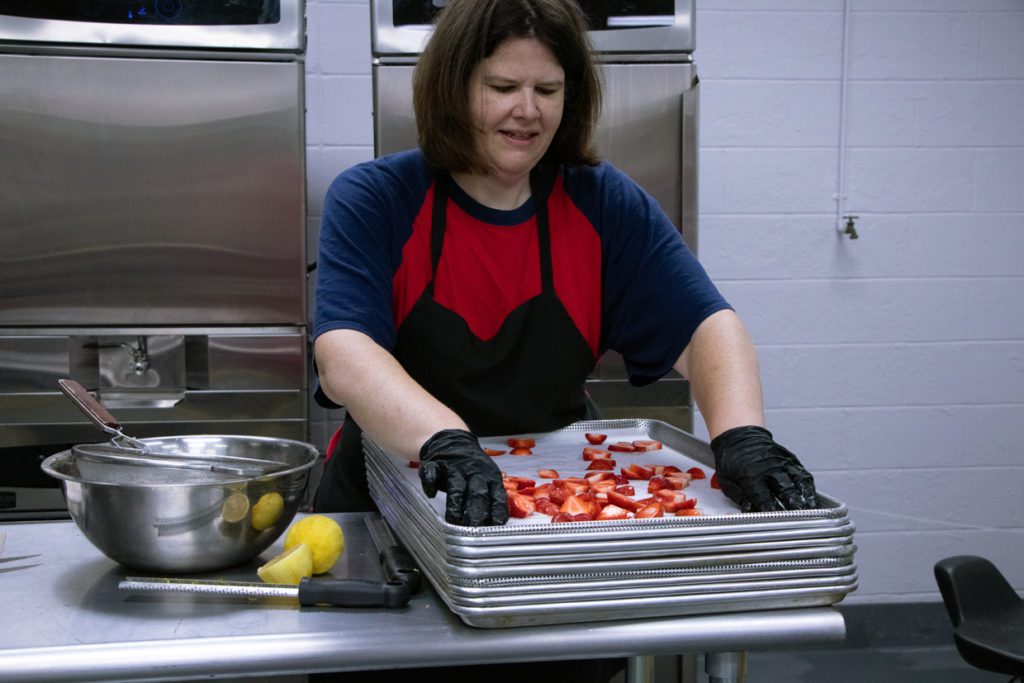
- Kale – washed, de-stemmed, and torn into smaller strips
- Strawberries – washed, de-stemmed and sliced
- Lemon Zest – microplaned zest from fresh lemons
- Pink Grapefruit – washed, sliced
- Mushrooms – Shiitakes – cleaned, de-stemmed, left whole
- Bananas – peeled, sliced
Preparing
After prepping the foods, they were ready for the ovens. This was one of those rare cases where the CVap ovens were used without water. Ordinarily, CVap technology uses two heat systems: moist vapor heat and dry air heat. However, dehydrating calls for dry heat only.


The Settings
- Cook Time: Infinite
- Vapor Temp: OFF – No Water in Evaporator
- Air Temp: Range 120-125°F (49-52°C)
The Process – Fruits and Veggies
- Preheat oven.
- Use perforated sheet pans (*Note – we used parchment paper but found that it hindered the dehydration process. For best results, do not use liners for fruits and vegetables).
- Place food product on the perforated pans, single layer and spaced apart. Feel free to add any flavor enhancers or seasonings to the product at this stage. We sprinkled one pan of grapefruit with granulated sugar. Sugar is hygroscopic (it tends to absorb moisture from air). Consequently, it extended the necessary dehydration time longer on that grapefruit.
- Place pans into the oven and start the cook cycle. Keep an eye on the products and check progress hourly. Dehydration time will vary depending on the type of product, size of product and expectation or degree of dryness.
- Remove product once it reaches the desired level of desiccation.
The Results
The kale maintained a beautiful dark green color. Texture was crisp and perfect for pulverizing into powder. Kale power can be used in shakes, coatings, or however you see fit!

The strawberries were still pliable, with a slight chew. I think this was because the naturally occurring sugar content is higher. They can used in a multitude of applications.
Lemon zest was fragrant and maintained its yellow color. Lemon zest is great for anything needing an extra kick of lemony essence (not sour or citrus but true LEMON flavor – much like an essential oil type).
Pink grapefruit turned out beautifully. It looked like little circles of stained glass.
Mushrooms were stone dry. They maintained color and shape.
Why Dehydrate?
Dehydrating is an age-old method of preserving food. Removing moisture reduces the likelihood of bacteria spoiling the food (not that our ancestors knew much about bacteria). It’s still a method of preserving, but with the advent of vacuum sealers, foods can be dried and stored. Adding their concentrated flavor to a dish is as easy as opening a bag.
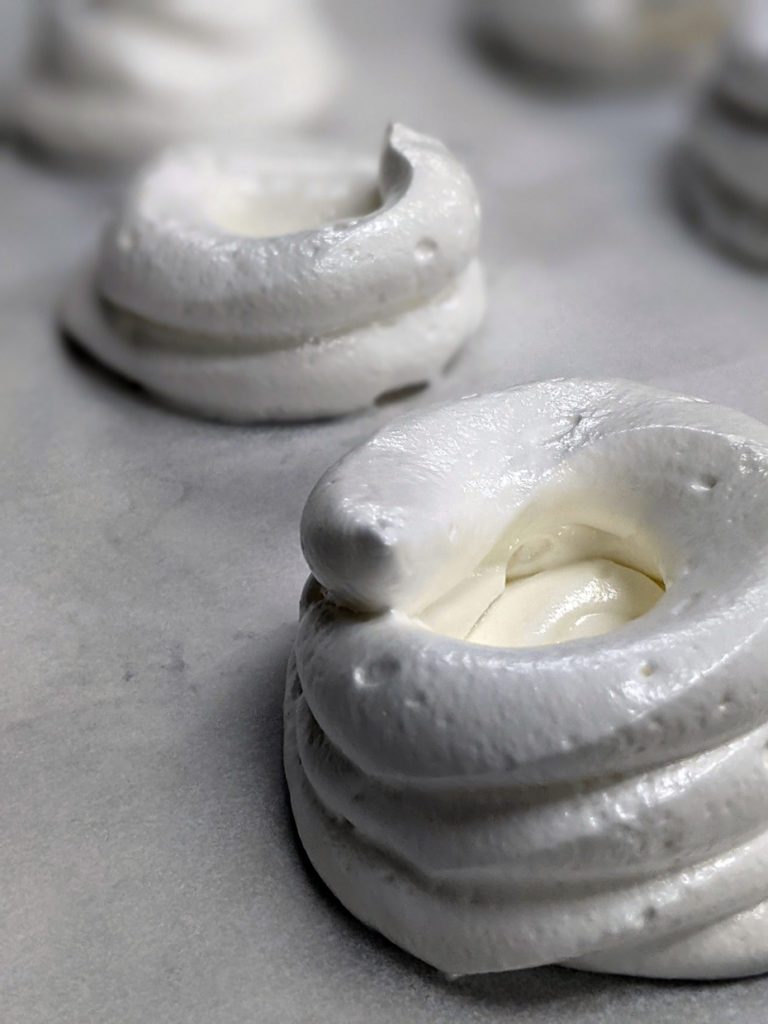
Pavlova Meringue
We prepared pavlova, a type of meringue. Although named for Russian dancer Anna Pavlova, its origins are in Australian cuisine. The traditional piped shape of the dessert is supposed to be reminiscent of Anna’s voluminous dresses.
Recipe
- 12 dozen egg whites, room temp
- 1 T lemon juice
- 3 cups granulated sugar
- 1 T vanilla
- 1 T + 1t cornstarch
The Process
Whip the egg whites, slowly adding sugar until it’s completely incorporated.
Next fold in the remaining ingredients and pipe into desired shapes onto a lined sheet pan. For this pavlova, we made individual little cups, as pictured.
The Accidental Extended Test
Ok, so I was supposed to pull these lovies out of the oven immediately following the Labor Day holiday. However, I encountered an unforeseeable crisis and ended up leaving them in the oven for six days! Thankfully I gave myself some flexibility with a failsafe step. Before I left for the weekend, I turned the program down from OFF/120°F to OFF/90°F.
Although one might expect the pavlova to be ruined after a week, they were still in great shape! The results were lighter than air, sweet, crispy, and with a touch of chew! I think traditional pavlova is supposed to be more like fluffy marshmallow toward the center. That can be easily remedied by decreasing cook time! Ha!